
The Ultimate Guide to Drywall: Tools, Techniques, and Tips for Installation and Repair"

Overview
Drywall is an essential component in modern construction, offering a versatile and efficient solution for creating walls and ceilings. Whether you're a DIY enthusiast looking to tackle a home project or a professional in the construction industry, understanding the intricacies of drywall installation, repair, and safety is crucial. This comprehensive guide explores everything you need to know about drywall, from the tools and materials required to the techniques and safety considerations. Dive into the world of drywall with us and discover valuable insights, tips, and product recommendations available at GoVets, your one-stop destination for all things drywall.
Table of Contents
- Introduction to Drywall: Understanding the basics, types of drywall, and where to use them.
- Drywall Tools and Accessories: A detailed overview of tools, including specialty tools, lifts, corded and cordless sanders, and their accessories.
- Anchors, Nails, and Screws: Choosing the right fasteners for different drywall applications.
- Installation Techniques: Step-by-step guide to installing drywall, including tips for using drywall lifts and grid adapters.
- Sanding and Surface Preparation: How to achieve a smooth finish with drywall sanders and abrasives, including both corded and cordless options.
- Repair and Maintenance: Tips and tools for repairing drywall, including plastering tools and specialty tool accessories.
- Safety Considerations: Best practices for safe handling of drywall tools and materials.
- Conclusion: Final thoughts and a summary of the guide.
1. Introduction to Drywall: Understanding the Basics, Types of Drywall, and Where to Use Them
What is Drywall?
Drywall, also known as plasterboard or wallboard, is a panel made of gypsum plaster pressed between two thick sheets of paper. It's used to create interior walls and ceilings in buildings, providing a smooth surface for painting or wallpapering. Drywall has become a standard in modern construction due to its ease of installation, cost-effectiveness, and adaptability.
Types of Drywall
- Standard Drywall: The most common type, used in most residential and commercial applications.
- Moisture-Resistant Drywall: Designed for areas prone to moisture, such as bathrooms and kitchens.
- Fire-Resistant Drywall: Used in commercial buildings or garages, this type of drywall contains special fibers that make it more resistant to fire.
- Soundproof Drywall: Ideal for rooms where noise reduction is desired, such as home theaters or bedrooms.
- Eco-Friendly Drywall: Made from recycled materials, this drywall is a sustainable choice for environmentally conscious builders.
Where to Use Different Types of Drywall
- Standard Drywall: Living rooms, bedrooms, hallways.
- Moisture-Resistant Drywall: Bathrooms, kitchens, laundry rooms.
- Fire-Resistant Drywall: Commercial spaces, garages, utility rooms.
- Soundproof Drywall: Home theaters, music rooms, bedrooms.
- Eco-Friendly Drywall: Any application where sustainability is a priority.
Why Choose Drywall?
- Versatility: Drywall can be cut and shaped to fit any design, making it suitable for various architectural styles.
- Cost-Effective: Compared to traditional plastering, drywall is often more affordable and quicker to install.
- Energy Efficiency: Drywall provides insulation, helping to keep rooms warm in winter and cool in summer.
- Ease of Repair: Damaged drywall can be easily repaired or replaced, making maintenance simple.
Summary
Understanding the basics of drywall is the first step in any drywall project. Whether you're a DIY enthusiast or a professional contractor, knowing the different types of drywall and where to use them will help you make informed decisions. From standard applications to specialized needs like moisture resistance or soundproofing, drywall offers a versatile and practical solution for interior construction.
In the next section, we'll dive into the tools and accessories essential for working with drywall, including specialty tools, lifts, corded and cordless sanders, and their accessories. Stay tuned for a detailed overview that will equip you with the knowledge and confidence to tackle any drywall project.
2. Drywall Tools and Accessories
Introduction
Drywall installation and repair require a specific set of tools and accessories to ensure a smooth and professional finish. From cutting and shaping to fastening and finishing, each step of the process demands precision and expertise. This section provides a comprehensive overview of the essential tools and accessories needed for drywall work, including specialty tools, lifts, corded and cordless sanders.
Specialty Tools
Drywall Knife: Used for cutting and shaping drywall.
Trowel: For smoothing and spreading joint compound.
Pry Bar: Used for removing nails and prying panels.


Crimping Tools: Essential for securing metal corners.
Staple Gun: For fastening the drywall to the framing.
Air-Powered Nail Guns: An alternative to the staple gun for fastening.
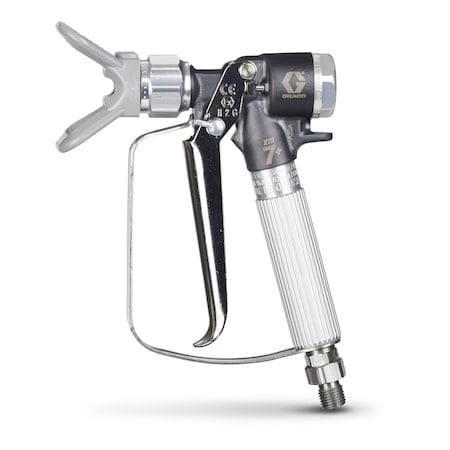
Paint Sprayer: For applying primer and paint evenly.

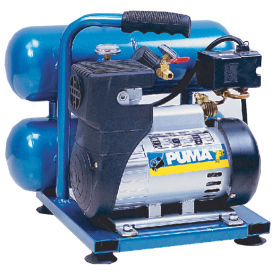
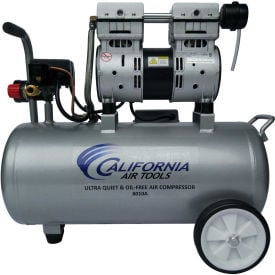
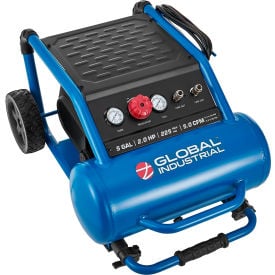
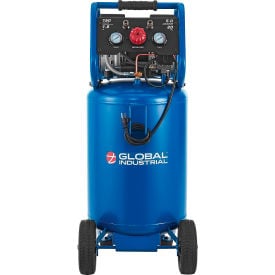
Air Compressor: Powers pneumatic tools like nail guns.
-
 Regular Price $1037.99 Special Price $547.96
 -
 Regular Price $803.29 Special Price $424.02
 -
 Regular Price $1125.49 Special Price $594.26
 -
 Regular Price $2189.99 Special Price $1156.29
Sledge Hammer: For demolition and major adjustments (aka demolition hammers).
Utility Knife: For precise cutting and trimming.
Drywall Lifts
Drywall lifts are essential for installing drywall on ceilings or high walls. They come in various types, each serving a specific purpose:
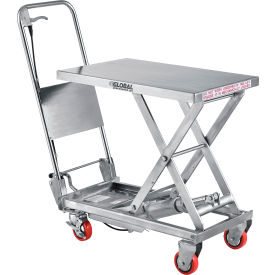
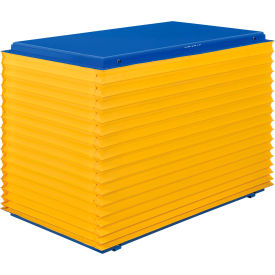
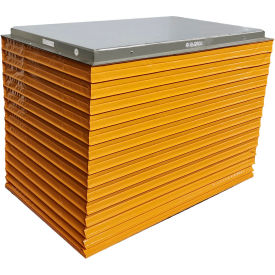
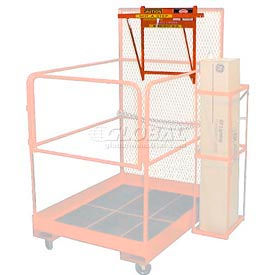
Scissor Lifts: Ideal for expansive warehouses, enabling workers to stock or retrieve items from tall shelves efficiently.
-
 Regular Price $588.79 Special Price $310.75
 -
 Regular Price $4569.29 Special Price $2412.54
 -
 Regular Price $2879.79 Special Price $1520.44
 -
 Regular Price $4784.49 Special Price $2526.11
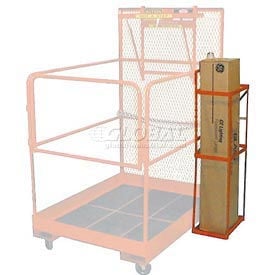
Personnel Lifts: Designed to lift one or two people to short heights, perfect for light maintenance.
-
 Regular Price $413.99 Special Price $218.52
 -
 Regular Price $3680.99 Special Price $1943.54
 -
 Regular Price $562.29 Special Price $296.76
 -
 Regular Price $477.79 Special Price $252.24
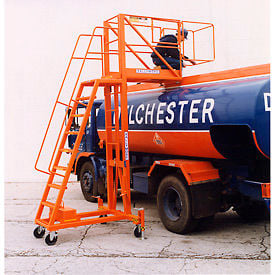
Tower Climbing Platforms: Designed for vertical ascent, climbing structures like towers or poles.
Corded and Cordless Sanders
Sanding is a critical step in achieving a smooth finish. Both corded and cordless sanders have their applications:
Corded Drywall Sanders: These provide consistent power and are ideal for large-scale projects. Shop Corded Sanders on GoVets.
Cordless Drywall Sanders: Offering the freedom of movement, cordless sanders are perfect for smaller tasks and tight spaces. Shop Cordless Sanders on GoVets.
Accessories
Paper Joint Tape: Essential for sealing joints between drywall panels.
Dustless All-in-One Finishing Sponge: For dust-free sanding and finishing. Shop Sponges on GoVets
-
 Regular Price $110.00 Special Price $67.29
 -
 Regular Price $15.48 Special Price $11.99
 -
 Regular Price $5.38 Special Price $4.29
 -
 Regular Price $4.25 Special Price $3.49
Extension Ladders and Scaffolding: For reaching high areas.
Conclusion
Drywall tools and accessories are specialized instruments designed to make the installation and repair process efficient and professional. From specialty tools to lifts and sanders, each tool plays a vital role in achieving the desired finish. By understanding the function and application of these tools, both DIY enthusiasts and professionals can execute drywall projects with precision and ease. Explore the wide selection of drywall tools and accessories available on GoVets to find the perfect products for your next project.
3. Anchors, Nails, and Screws: Choosing the Right Fasteners for Different Drywall Applications
Introduction
When it comes to drywall installation, the right fasteners are crucial for a secure and professional finish. Anchors, nails, and screws are the primary fasteners used in drywall applications. This section will provide an in-depth look at these essential components, helping you choose the right ones for your project.
Drywall & Hollow Wall Anchors
Drywall anchors are used to secure objects to drywall, especially when there's no stud behind the wall to screw into. They come in various types, including:
Alloy Steel Framing Drywall & Hollow Wall Anchor: Ideal for heavy-duty applications, providing strong support.
Concrete Anchors: Designed for attaching objects to concrete walls.
Toggle Bolts: Suitable for hanging heavy items on hollow walls.
Plastic Expansion Anchors: Perfect for light to medium-weight applications.
Drywall Nails
Nails are commonly used to attach drywall to wood framing. They are typically less expensive than screws but may not provide the same level of holding power. Some popular options include:
- Construction Staples: Used for securing wire mesh or lath to wood or metal framing.
- Nails: Available in various sizes and finishes, suitable for different applications.
Drywall Screws
Screws offer more holding power than nails and are commonly used in drywall installation. They come in different types, such as:
- Coarse Thread Screws: Ideal for attaching drywall to wood studs.
- Fine Thread Screws: Used for attaching drywall to metal studs.
- Self-Drilling Screws: Designed to drill their holes, eliminating the need for pre-drilling.
Top brands that offer screws include Hillman, Simpson Strong-Tie, and MSC Industrial Supply.
Conclusion
Choosing the right fasteners is a critical step in drywall installation. Whether it's anchors for hanging heavy objects, nails for attaching drywall to wood framing, or screws for a more secure hold, understanding the different types and their applications will ensure a successful project. Explore the wide selection of anchors, nails, and screws available on GoVets to find the perfect products for your drywall needs.
4. Installation Techniques: Step-by-step Guide to Installing Drywall
Introduction
Installing drywall is a fundamental part of building interiors, and while it may seem straightforward, it requires careful planning and execution. This section will guide you through the step-by-step process of installing drywall, including tips for using drywall lifts and grid adapters.
Step 1: Planning and Measuring
- Measure the Area: Determine the size of the area where the drywall will be installed.
- Choose the Right Drywall: Select the appropriate type of drywall based on the location (e.g., moisture-resistant for bathrooms).
- Plan the Layout: Plan the placement of drywall sheets to minimize waste.
Step 2: Cutting and Shaping
- Mark the Cut Lines: Use a straight edge and pencil to mark where you'll cut.
- Cut the Drywall: Use a drywall knife or saw to cut along the lines.
- Shape the Edges: Smooth the edges with a rasp or sandpaper.
Step 3: Installing on Walls
- Apply Adhesive: If using adhesive, apply it to the studs.
- Position the Drywall: Start from the top corner and align the drywall with the studs.
- Secure with Screws: Use drywall screws to secure the drywall to the studs.
Step 4: Installing on Ceilings (Using Drywall Lifts)
Drywall lifts are essential for installing drywall on ceilings. Here's how to use them:
- Set Up the Lift: Assemble the drywall lift according to the manufacturer's instructions.
- Load the Drywall: Place the drywall sheet on the lift's platform.
- Lift and Position: Use the lift to raise the drywall to the ceiling and position it correctly.
- Secure the Drywall: Fasten the drywall to the ceiling joists with screws.
Step 5: Using Grid Adapters
Drywall grid adapters like the Device Retainer Drywall Tile Panel Walls can be used to secure fixtures like lighting or ventilation systems.
- Attach the Adapter: Secure the grid adapter to the desired location.
- Install the Fixture: Attach the fixture to the adapter according to the manufacturer's instructions.
Step 6: Finishing
- Tape the Joints: Apply joint tape over seams and corners.
- Apply Joint Compound: Use a trowel to apply joint compound over the tape.
- Sand the Surface: Once dry, sand the surface for a smooth finish.
- Paint or Wallpaper: Apply paint or wallpaper as desired.
Conclusion
Installing drywall is a meticulous process that requires attention to detail and the right tools. From cutting and shaping to using specialized equipment like drywall lifts and grid adapters, each step plays a vital role in achieving a professional finish. By following this step-by-step guide, both DIY enthusiasts and professionals can ensure a successful drywall installation. Explore the wide selection of drywall tools and accessories available on GoVets to find everything you need for your next project.
5. Sanding and Surface Preparation: How to Achieve a Smooth Finish with Drywall Sanders and Abrasives
Introduction
Sanding is a critical step in the drywall finishing process. It ensures a smooth and even surface, ready for painting or wallpapering. This section will guide you through the various tools and techniques to achieve a perfect finish, including both corded and cordless drywall sanders and abrasives.
Corded Drywall Sanders
Corded drywall sanders are powerful tools that provide consistent performance. Here's a look at some popular options:
- Drywall Sander 4.2A 16 ft Cord MPN:GE 5 + SH 120/USA: A versatile sander with adjustable speed settings, perfect for various sanding tasks.
- Sander Drywall Corded MPN:DWE7800: Known for its ergonomic design, this sander offers comfort and control.
How to Use Corded Drywall Sanders
- Choose the Right Abrasive: Select the appropriate grit size for your project.
- Attach the Sanding Disc: Secure the sanding disc to the sander.
- Connect to a Dust Collector: For a clean workspace, connect the sander to a dust collector.
- Start Sanding: Apply gentle pressure and move the sander in circular motions.
Cordless Drywall Sanders
Cordless drywall sanders offer the convenience of portability without the need for a power outlet. Here's a top pick:
- Cordless Drywall Sander Kit 18V 1800 RPM MPN:XLS01T: This sander offers flexibility with adjustable speed settings and a compact design.
How to Use Cordless Drywall Sanders
- Charge the Battery: Ensure the battery is fully charged.
- Select the Right Abrasive: Choose the sanding disc with the correct grit size.
- Start Sanding: Use the sander in a consistent pattern to avoid over-sanding.
Drywall Sander Abrasives
Abrasives play a crucial role in achieving a smooth finish. Here are some options:
- DRYWALL PAD DISC 9 AO 80G PK5 MPN:77085: These discs are designed for efficient sanding.
How to Choose and Use Abrasives
- Select the Grit Size: Coarser grits remove more material, while finer grits create a smooth finish.
- Attach the Abrasive: Secure the abrasive to the sander.
- Sanding Technique: Use even pressure and consistent movements.
Tips for Achieving a Smooth Finish
- Start with a Coarser Grit: Remove imperfections with a coarser grit and gradually move to finer grits.
- Use a Sanding Block for Corners: For tight corners, use a hand sanding block.
- Clean the Surface: Wipe the surface with a damp cloth to remove dust before painting.
Conclusion
Sanding and surface preparation are vital for a flawless drywall finish. Whether using corded or cordless drywall sanders, understanding the tools and techniques is key to success. Explore the wide range of sanders and abrasives available on GoVets to find the perfect products for your next drywall project.
6. Repair and Maintenance: Tips and Tools for Repairing Drywall, Including Plastering Tools and Specialty Tool Accessories
Introduction
Drywall repair is a common home maintenance task that requires specific tools and techniques. Whether it's a small hole or a large crack, repairing drywall is something that every homeowner may face at some point. This section will guide you through the process of repairing drywall, including the use of plastering tools and specialty tool accessories.
Understanding Drywall Damage
Drywall damage can occur for various reasons, such as accidental knocks, moisture, or settling of the house. The type of repair needed depends on the extent and nature of the damage. Here's how to assess:
- Small Holes: Typically caused by nails or screws.
- Large Holes: Often a result of impact or accidents.
- Cracks: May occur due to structural movement or temperature changes.
- Water Damage: Leaks can cause discoloration and weakening of the drywall.
Tools for Drywall Repair
Plastering Tools
Plastering tools are essential for applying joint compound and smoothing surfaces. Some popular options include:
- Taping Knife 12 Stainless Steel MPN:DW12: Ideal for applying joint compound.
- Plastering Trowel 11 x 4-1/2 MPN:MXS62D: Perfect for smoothing plaster.
Specialty Tools
Specialty tools are designed for specific tasks in drywall repair. Examples include:
- Spray Shield 36 L x 9 W FlexPlastic MPN:DC192: Protects surrounding areas during spraying.
- Drywall Specialty Tools FDW8203-U: A collection of tools for various drywall tasks.
Step-by-Step Guide to Drywall Repair
- Assess the Damage: Determine the type and extent of damage.
- Prepare the Area: Remove loose debris and protect the surrounding area.
- Cut Out the Damaged Section: Use a utility knife to cut around the damaged area.
- Apply a Patch: For larger holes, apply a drywall patch.
- Apply Joint Compound: Use a taping knife to apply joint compound.
- Sand the Surface: Once dry, sand the area to a smooth finish.
- Paint: Match the existing wall color and paint the repaired area.
Tips for Successful Drywall Repair
- Use the Right Tools: Select tools specifically designed for drywall repair.
- Take Your Time: Allow sufficient drying time between steps.
- Match the Texture: If the wall has a texture, try to replicate it for a seamless repair.
Conclusion
Repairing drywall is a manageable task with the right tools and techniques. From plastering tools to specialty accessories, having the right equipment makes the process smoother. Explore the wide range of drywall repair tools available on GoVets to find everything you need for your next repair project.
7. Safety Considerations: Best Practices for Safe Handling of Drywall Tools and Materials
Introduction
Working with drywall involves various tools and materials that, if not handled properly, can pose safety risks. This section outlines the best practices for safe handling of drywall tools and materials, ensuring a secure working environment for both DIY enthusiasts and professionals.
Safety with Drywall Tools
Drywall tools, including knives, trowels, sanders, and specialty tools, must be handled with care. Here are some safety guidelines:
- Use the Right Tool for the Job: Selecting the appropriate tool minimizes the risk of accidents.
- Inspect Tools Regularly: Check for any damage or wear that could lead to malfunction.
- Wear Appropriate Personal Protective Equipment (PPE): Safety glasses, gloves, and dust masks can protect against injuries.
- Follow Manufacturer's Instructions: Always adhere to the guidelines provided by the tool's manufacturer.
- Store Tools Properly: Keep tools in a secure place to prevent accidental injuries.
Safety with Drywall Materials
Drywall materials include panels, joint compounds, adhesives, and more. Here's how to handle them safely:
- Handle Drywall Panels with Care: Drywall panels can be heavy and awkward to carry. Use proper lifting techniques and consider using a drywall lift for installation.
- Avoid Inhalation of Dust: Sanding drywall can produce dust. Use a dust mask and ensure proper ventilation.
- Store Materials Safely: Keep materials in a dry and secure location to prevent deterioration or accidental spills.
Specific Safety Considerations
Hand Tools
Explore the wide range of hand tools for drywall and plastering on GoVets. Here are some specific safety considerations:
- Knives and Blades: Always cut away from your body and keep blades sharp to prevent slipping.
- Sanders: Use with proper dust extraction and wear a mask to prevent inhalation of dust particles.
Drywall Specialty Tool Accessories
Find various drywall specialty tool accessories on GoVets. Safety considerations include:
- Spray Shield: Use a spray shield like the Spray Shield 36 L x 9 W FlexPlastic MPN:DC192 to protect surrounding areas during spraying.
Summary
Safety should always be the priority when working with drywall tools and materials. By following best practices and using the right tools and PPE, you can minimize risks and ensure a safe working environment. Explore the wide range of drywall tools and accessories available on GoVets to find quality products that meet safety standards.
Final Thoughts
Drywall is more than just a building material; it's a canvas that turns a house into a home. Through this extensive guide, we've explored the various facets of working with drywall, from selecting the right tools and materials to mastering installation techniques and ensuring safety. Whether you're just starting your drywall journey or looking to enhance your existing skills, we hope this guide serves as a valuable resource. At GoVets, we're committed to supporting your projects with quality products and expert advice. Explore our wide range of drywall-related products and let us be a part of your next successful project. Happy building!